By Shelley Farrar, MSc, BSc
Fluorescence Microscopy allows specimens to be studied with high sensitivity and specificity through the use of light. It works on the principle that energy emitted by certain types of materials can be detected as light, if irradiated with the light of a specific wavelength. A fluorescent chemical compound called a fluorophore absorbs the light of the specific wavelength that illuminates the specimen and emits light of longer wavelengths.
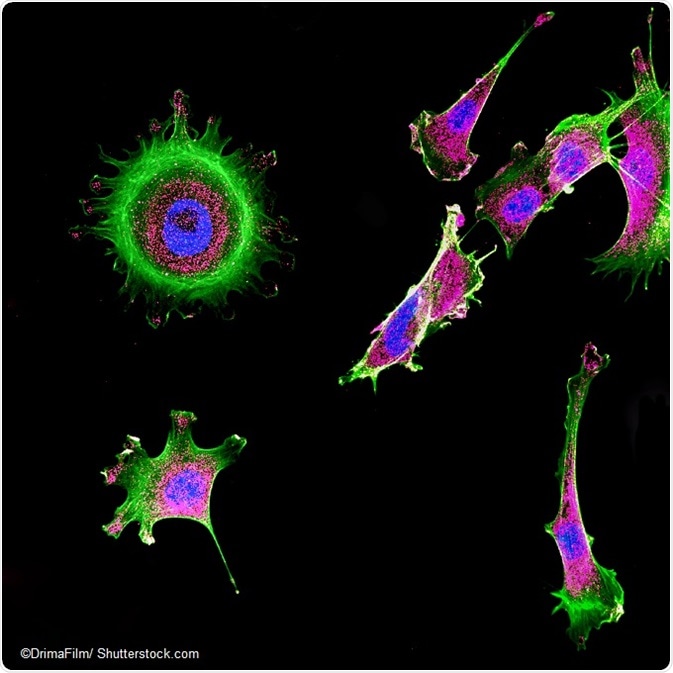
IMAGE: Immunofluorescence of multiple tumor cells grown in tissue culture.
This emitted light is then separated from the original, brighter excitation light through a filter. In order for this process to work the sample must be prepared so that it is fluorescent. Samples can be either live cells or dead fixed cells that maintain their cellular structure, with cell preparation differing between the two.
Preparing the sample with immunofluorescence
A technique used for samples of fixed cells is immunofluorescence which utilizes the specific binding abilities of antibodies to its antigen. A specific antibody, called a primary antibody, will bind to the particular protein being identified. There are two variants of immunofluorescence:
- Direct immunofluorescence- (in which the primary antibody is directly bound to a fluorophore).
- Indirect immunofluorescence- (in which the primary antibody binds to a fluorescent secondary antibody, which emits light and determines the location of the protein).
Direct immunofluorescence is faster than the indirect version of the method as the indirect washing and incubation steps are not required. However, the indirect method provides more flexibility as the fluorescent secondary antibody can be combined with different primary antibodies. Immunofluorescence cannot be used in live-cell imaging and is restricted through the need to find antibodies that recognize the protein of interest.
Fixation of the sample has to occur first so that the sample appears as close as possible to a living sample with no loss of proteins, lipids or other molecules. Cross-linking fixation is a technique in which aldehyde groups cross link molecules within the cell, though this can hinder antigen binding. Organic solvents such as methanol or acetone can also be used to fix proteins to their cellular contexts. Though the structure of the cell is maintained, some solvents can destroy the epitope of an antigen. The method of fixation has to be specific to the antibody chosen, where a balance between good preservation and binding ability is found.
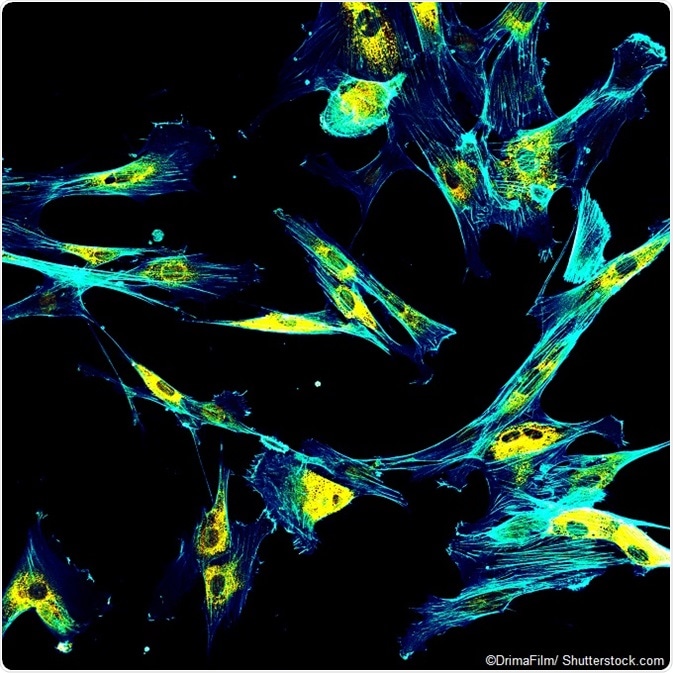
IMAGE: Immunofluorescence confocal imaging of fibroblasts with endoplasmic reticulum in yellow and cytoskeleton in cyan
Preparing the sample with fluorescent proteins - Green Fluorescent Proteins
For live cells, proteins can be genetically modified to carry a fluorescent protein reporter. Green Fluorescent Proteins (GFPs) from the jellyfish Aequorea Victoria are used as a fluorescent tag to visualize proteins within cells. Further engineering has developed several mutant Fluorescent Proteins (FPs) that are bright, stable and chromatically diverse.
The spectral variety of these FPs means that the simultaneous visualization of several proteins in a cell can occur. This technique has been applied to live cell imaging techniques. The GFP gene is incorporated into the region of DNA that codes for the proteins being targeted. As this is controlled by the same regulatory sequence, when the gene is expressed, GFP is produced at the same time as the tagged proteins.
Preparing the sample with fluorescent proteins - self labeling enzymes
Another method of labeling proteins is through self-labeling enzymes called Halo tags or SNAP/CLIP tags. The self-labelling enzymes can covalently attach a fluorescent ligand to its amino acid residue and are a similar size to FPs. The proteins expressed are not innately fluorescent and only fluoresce when exposed to the fluorescent ligand. In comparison to labelling with FPs, this technique has the advantage of restricting the labeling for certain times and areas, allowing for sequential labeling. This technique has been applied to pulse-chase experiments in which a cellular process is examined as it occurs over time. Using self-labeling enzymes also allows protein populations to be tracked across a period of time.
Sources:
- www.leica-microsystems.com/.../
- Mohan, K. et al. 2008. Techniques of immunofluorescence and their significance. Indian Journal of Dermatology, Venereology and Leprology, 74, pp. 415-419. www.ijdvl.com/article.asp
- Crivat, G. & Taraska, J. 2012. Imaging proteins inside cells with fluorescent tags. Trends in Biotechnology, 30, pp. 08-16. https://www.ncbi.nlm.nih.gov/pmc/articles/PMC3246539/
- Chudakov, D. et al. 2005. Fluorescent proteins as a toolkit for in vivo imaging. Trends in Biotechnology, 23, pp. 605-613. https://www.ncbi.nlm.nih.gov/pubmed/16269193
- Rashidan, M. et al. 2013. Enzymatic labeling of proteins: techniques and approaches. Bioconjugate Chemistry, 24, pp. 1277-1294. http://pubs.acs.org/doi/abs/10.1021/bc400102w
Further Reading
Last Updated: Aug 23, 2018